

Here from John Robin’s Epic Fantasy Writer Blog? Scroll down to get straight to the tutorial!
What is an epic fantasy novel without a map?

Just like we need Siri to tell us how to find the closest café or, if you prefer, the closest wine bar, a properly built fantasy world should have a way to navigate through it. Otherwise the reader is running around blind, sometimes struggling to visualize how close Mordor really is to Ithilien and the city of Minas Tirith, or how Frodo and Sam were so far from everything green and good in the Shire. Charting your basic course is not so hard, the map creates itself as your characters journey across the land, sea, or even air, and you should be drawing the landscape and marking the cities along the way. But once you get to the final draft, how do you decide what that final masterpiece of a map is going to look like?


 There is no end to the way maps can look. And I urge you to explore different styles, including black and white, because, after all, it’s going to end up in a printed book someday, right? Play around with different variations. Find something that fits the design style of the world your characters live in. Use the frame area for designs and symbols that are critical to the world’s inhabitants. What do their deities look like? How are they represented? These images will look amazing turned into line art as they adorn the edges of your map, and will make the world become even more real for your reader.
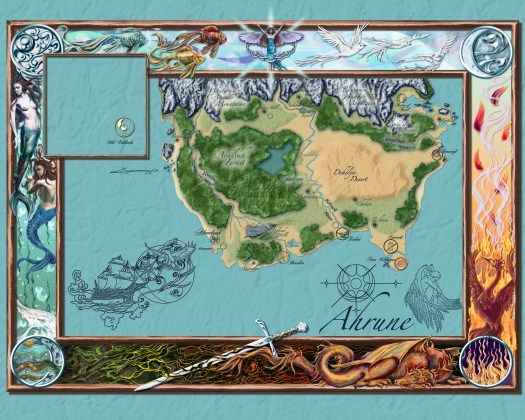
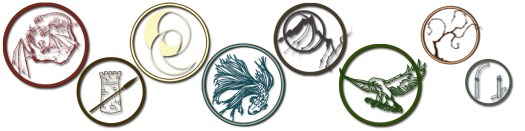
The map I created for The Shifting Balance uses symbols for each city. The elements of Air, Water, Earth, and Fire play a huge role in the magic and religious aspects of the people. I used symbols for each element and painted them with Photoshop along the frame. I plan on trying out different looks and styles, using sepia tones and stain marks to give it an aged look. I still want to add some chart lines for realism, adding to the nautical related line art and compass rose within. And don’t forget that compass rose! The moment a familiar shape like this is added, your map is suddenly a real place, torn from the pages of a historical document from a museum! It’s all in the details, and the best place to look on how best to create it is by looking at others. Books and gaming are both filled with beautiful maps; even old maps from our own world offer up details that will make your fantasy world more authentic.

For more ideas and inspiration on maps, and even some tutorials on how to draw them, visit and follow my Pinterest Board that I created just for you! Fantasy Maps
Now for something completely different…
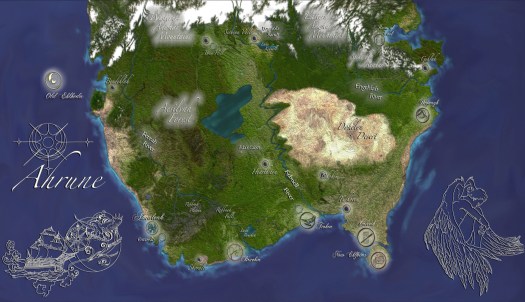
What if you wanted something new and different? How about a map that looks like it could have been a photograph taken from space? In all my searches I haven’t found a single fantasy map that looked like a Google Earth image. So I decided to play with this idea, and here is what I came up with:
I created a tutorial for those of you who want to give it a try. It was actually pretty easy. If you want to learn how, keep reading for the Tutorial!
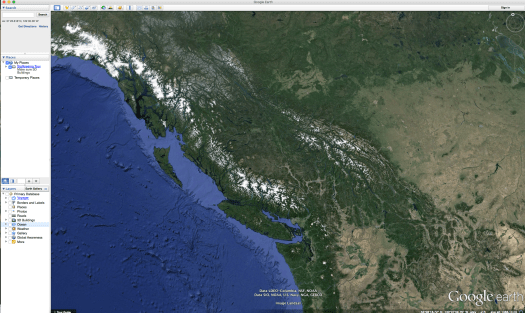
I use a free 3D art program called Blender 3D, some free NASA Photos, and Photoshop. Don’t want to take the time to learn Blender? That’s all right, you can do the same thing using Google Earth images. Just be sure to turn off all the labels before taking a screen shot. Good luck and have fun!
No matter how you decide to create your map, experiment and set your imagination free. Both you and your readers will be rewarded for your extra attention to detail.
THE TUTORIAL
My son and I were exploring Google Earth and it got me thinking: What if you took images from Google Earth and put them together with Photoshop?
Then, not a day went by when my favorite Blender 3D artist, Blender Guru, uploaded a new tutorial: Using free hi-res images from the NASA website, he created a cool and very epic Earth Image.
See it here: How to Make Earth (cycles)
A little history about me and Blender. I’m an artist, and as soon as I started creating my series The Shifting Balance, I wanted images. I wanted to make everything about it real. One day I stumbled upon a website talking about Blender 3D and I was hooked. It is an open source (free) and very powerful 3D software. You can model as though working with clay, you can animate, you can light your scenes… you can create the next epic, realistic looking video game if you were so inclined, or the next Toy Story movie. You can even add that fiery plasma-like substance to your videos of your kids pretending to be Harry Potter fighting Voldemort.
If that doesn’t make you want it, here is a beautiful short story, created a few years ago, by several Blender Artists: Sintel
Want to learn Blender? You can download it for free here: Blender.org
As for what I’ve been able to do, I made my book cover art (including this website’s header image) using scenes I created in Blender. I know, you’re thinking, ‘Yeah, great… something else I need to learn… but how does all this bring me to a discussion about making a map?’
Absolutely nothing… No, just kidding.
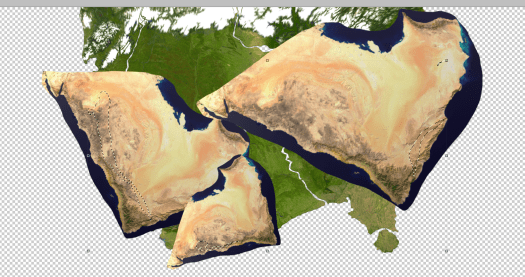
What if you wanted a map that looked as real as Google Earth? Using this idea, along with the Blender tutorial about making an Earth, I came up with this basic map of Ahrune:
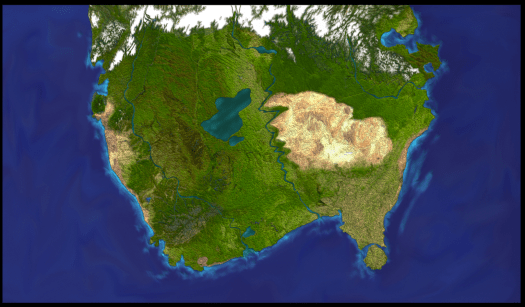
Now the following tutorial can be done with Blender, but if you don’t want to take the time to learn the basics of a 3D Art program, there is another way. You can install Google Earth on your computer, and then take screen shots of various land elements. What I did, was follow the Blender Guru Tutorial and made the Earth in Blender, so that it would have a 3D quality to the images—the mountains appear raised, etc. This part took less than an hour. Unless you want to, you don’t need to worry about adding the lights to the dark side, or even the clouds and atmosphere. You just need high quality images. Next I took screen shots of various areas, and then I opened up Photoshop. (If you don’t have Photoshop, there is open source free software called Gimp that does just about everything that Photoshop can do, but I’ve never used it, you might want to look for tutorials on Youtube in case there are any major differences.)
LET’S GET STARTED
So you did the above and have a basic drawing of your map (of course you do, you’ve been creating that right along with your story, right?) and several interesting land images taken from either your Blender Earth or Google Earth. Great!
Now, assuming you know the basics of Photoshop, let’s get started!
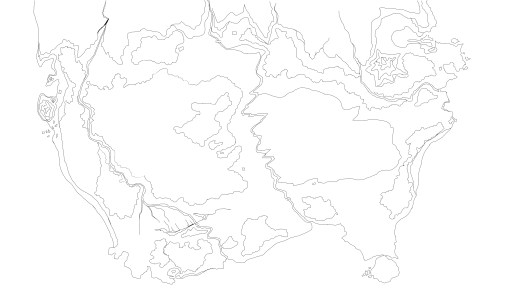
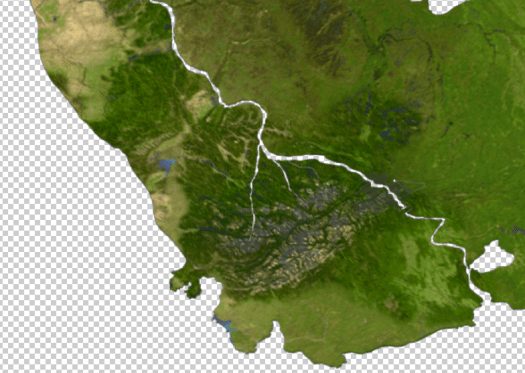
- Open your basic drawing in Photoshop; on a new layer trace over all the lines of the outer continental shape. If you have rivers that go all the way to the ocean, treat them like gaps between the land masses, also trace out your lakes too, but make sure there are no gaps in the lines—you’ll see why in a minute:
- Now do the same thing, starting with a new layer for your deserts, a new layer for any mountain ranges, and even a new layer for beaches.
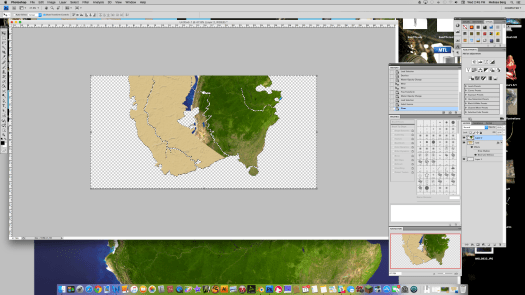
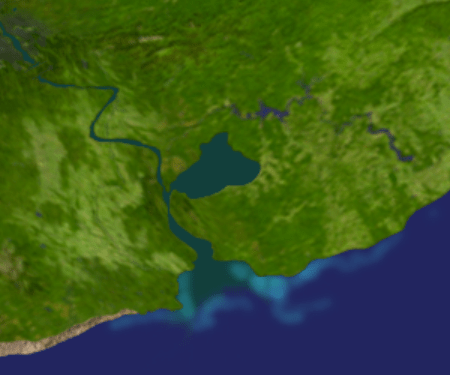
- Let’s pick an area you want to work in first. How about some nice lush greenery. Open an image that works for this in Photoshop. (I find that the Amazon Rain Forest, or the Northern areas of Russia are good for this. If you want a little more brown mixed in, how about the less green areas of Brazil?) Now with the Transform/Move tool drag the image onto your traced image. A new layer is automatically created.
- Position it where you want it over your drawing, resize and stretch it to fit accordingly, you can click on the handles to bring up the warp tool if you need to change the shape a bit too, but don’t over do it or the image will become too distorted and even fuzzy looking. Don’t worry about making the land line up perfectly with your outer lines, this doesn’t matter, just make sure everything that you want to have included in your continent is inside the main outline. If water is showing where you don’t want it, that’s okay.
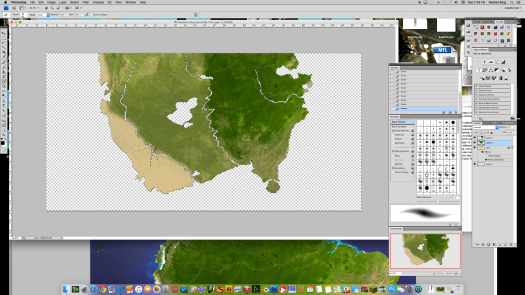
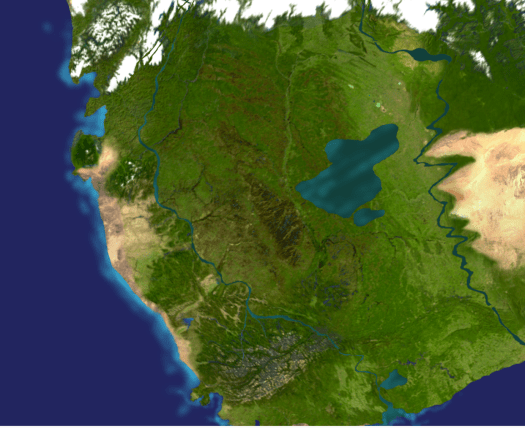
- Now, turn off all layers except your tracing of the main land mass. (In this image, you will see that I have already filled it in from a previous map project. You do not have to do this.) Use the magic wand selection tool to select everything outside the continent. Here is why it was so important to make sure you didn’t have any gaps in your lines. If the selection is grabbing pixels inside the continent where it shouldn’t, then deselect, go back in and connect those lines. Once the only area selected is your ocean and rivers, you can add to the selection by shift clicking with the magic wand inside your lakes.
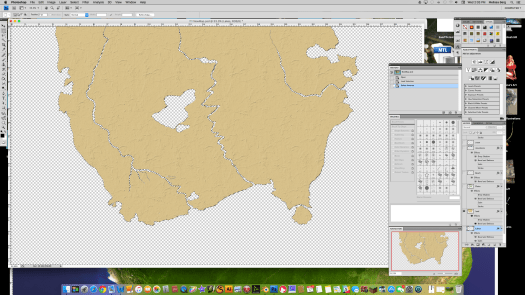
- Keeping the selection, go back to the image of real earth you had just dragged in and positioned; turn that layer on and then select that layer. Now hit Delete. Viola, it is now the shape of your continent.
- Deselect the active selection, now you can open another cool image, drag it onto your map, reposition it anywhere you want, select the original outline, go to the new image layer, hit Delete, and now you are filling in your entire continent. Do this as often as you need to.
- You don’t want hard edges, so use the Smudge or Erase tools with a soft brush and a low opacity setting and erase the edges until both land shapes blend in nicely together.
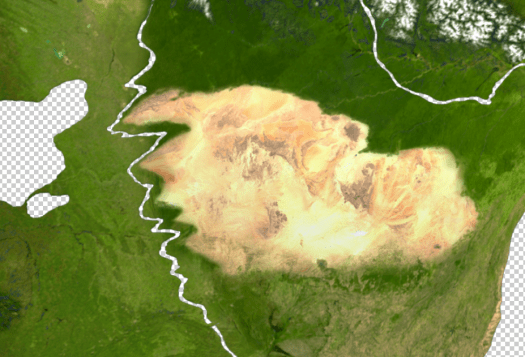
- Remember those Mountains and Deserts and Beaches you traced out on separate layers? Time to do those the same way. Let’s do the desert first. Get a screen shot of the Sahara Desert, now drag it onto your map. Instead of selecting the layer with the original continent tracing, select the shape of your Desert. Now just repeat the above steps. Mountains can be tricky, they might need some more stretching and repositioning until they look how you want them. I found the area of Western Canada and Alaska are good for Mountains, especially if you want some snow on top.
- For beaches I used Saudi Arabia and Egypt. There are some real nice contours and shapes in these.
- If you need to, use the Lasso Selection tool to draw around areas you want to use for filling in, or perhaps you have an area of thicker, greener forests in the middle of your map. Now use the Transform/Move tool to drag that selection onto your map.

- If your land masses are all finished, including any islands you might have, you can Delete the original drawings and tracings. Your continent should be sitting on a checkerboard now. Next, shift click all your remaining layers, then click on the little drop down menu at the top of the Layers Panel, and choose Merge Layers. Now, add a new layer and drag that layer beneath your main continent.
- Oceans are not all one color, so first, with a screen capture of the ocean opened in Photoshop, go to your color picker, you will get an eye dropper. Using that ocean photos, click on a good base color for your ocean. Now choose the Paint Bucket Tool; on the new empty layer, fill the whole thing in. Next, add another layer above this one and then choose a darker color, with a large soft brush paint wispy areas all around your ocean. Now blend those in with a large Smudge tool. If it seems like it stands out too much, change the opacity setting of that layer until it looks how you want it. Make another layer and use the Lasso Selection tool to draw a shape that will include all of your lakes and rivers. Pick a greenish color for the Paint Bucket and fill it in. Do more than one if you have to. Turn down the opacity of this layer until the lakes have a nice greenish blue color.
- Next pick a light Aquamarine color; on a new layer, paint with a smaller brush around your shorelines, especially near any beaches where the water might be more shallow. Smudge them a bit to blend them in. Also lightly go over your rivers and lakes to add a bit of reflected shine to them. Now merge all your layers again.
You are done!
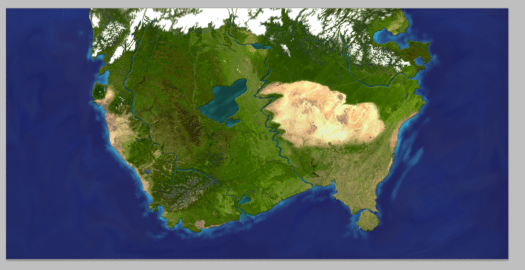
If you want to give it a slightly raised look like I did here, double-click the layer to make the Layer Styles Panel come up. Choose Bevel and Emboss and use these settings: Inner Bevel, Smooth, Depth=1, Direction=Up, Size=1, Soften=0. Choose Contour with these settings: Range should be High, about 60%. You can play with the Shading direction, but the Default should be fine.
Feeling even more ambitious and want to get that 3D look? Start a new Blender Project; insert a plain and resize it to the Aspect Ratio of your map. Then use your Map picture as its texture. Add a Bump Node and connect that to your image Texture between your Diffuse and Glossy Shaders. Adjust its strength so it is not too much, and here you go. If you want to know more about using Blender, let me know in the comments and I can connect you to many wonderful beginner Tutorials. If I could learn it, so can you. And you don’t have to know how to draw well either.
There is no end to the ideas you can come up with.
Why not use different textures instead of photo real images of earth, like different papers or fabrics? Give it a cut paper look. You can add your Cities, Sigils, chart lines, anything you want. You can play with the color to give it an older sepia tone, or even black and white for the final book print. Play with the brightness and contrast and Levels settings until they look right and the city names are easy to read.
If you decide to learn Blender, why not make it a 3D terrain map? Or make real buildings that rise up from it, in a Game of Thrones opening credits homage?
Above all, have fun making your world come to life!
Any questions? Ask me in the comments below. Already made a map? Share it with us in the comments below!
Credits:
Fantasy Worlds Map: http://flavorwire.com/376822/brilliant-spoofs-of-the-classic-fantasy-novel-map
Map idea 1: http://jenosavel.deviantart.com/art/Guild-Wars-Antique-Map-79344858
Map idea 2: http://www.arvidland.com/2011/05/sidney-sime-forgotten-master/
Map idea 3: https://www.flickr.com/photos/chapmancatalyst/4022297923/
<<<>>>
Melissa Berg is the author of the Shifting Balance Series, which has been her passion for the past ten years. She also works as an illustrator and studied art and design at Madison Area Technical College in Madison, Wisconsin. When she isn’t writing or painting or entertaining her son, she is pursuing the art of 3D computer illustration/animation, as a side project and to feed her fascination in the ever-expanding medium used for storytelling. She currently lives in Minnesota with her husband, young son, and a crazy Border Collie.
Check out my website or join my mailing list for further updates: http://theshiftingbalance.com
‘Like’ my pages on FaceBook: https://www.facebook.com/theshiftingbalance/
https://www.facebook.com/Melissa-Berg-Illustration-334413330053966/
Follow me on Twitter: @WhimzicalMusing


One Reply to “”